


Outdoor lighting can transform a yard into a welcoming stage after dusk, making evenings more usable and giving your property a new kind of curb appeal. Choosing the right fixtures takes a mix of practical thinking and a bit of design sense so the effect looks natural and works for daily needs.
Small technical details such as beam angle, bulb type, and weather rating have an outsized impact on how a scheme performs across seasons. With a few clear rules and an eye for how parts work together you can pick fixtures that last and look good night after night.
1. Choose The Right Fixture Type
Fixtures come in many forms such as low posts for pathways, stake lights for borders, focused spots for tree trunks, and recessed wells for steps, each offering a distinct role in an evening plan. Visual goals and safety needs drive type selection because a fixture that highlights a statuary piece will not do the same job as one that keeps a stair tread visible under foot traffic.
Think about whether a soft wash or a narrow beam is best where you plan to place each unit and how that output interacts with surrounding plants and hardscape. A simple rule of thumb is to pick the right tool for the job and avoid forcing a mismatch, otherwise you will end up with a solution that looks odd and functions poorly.
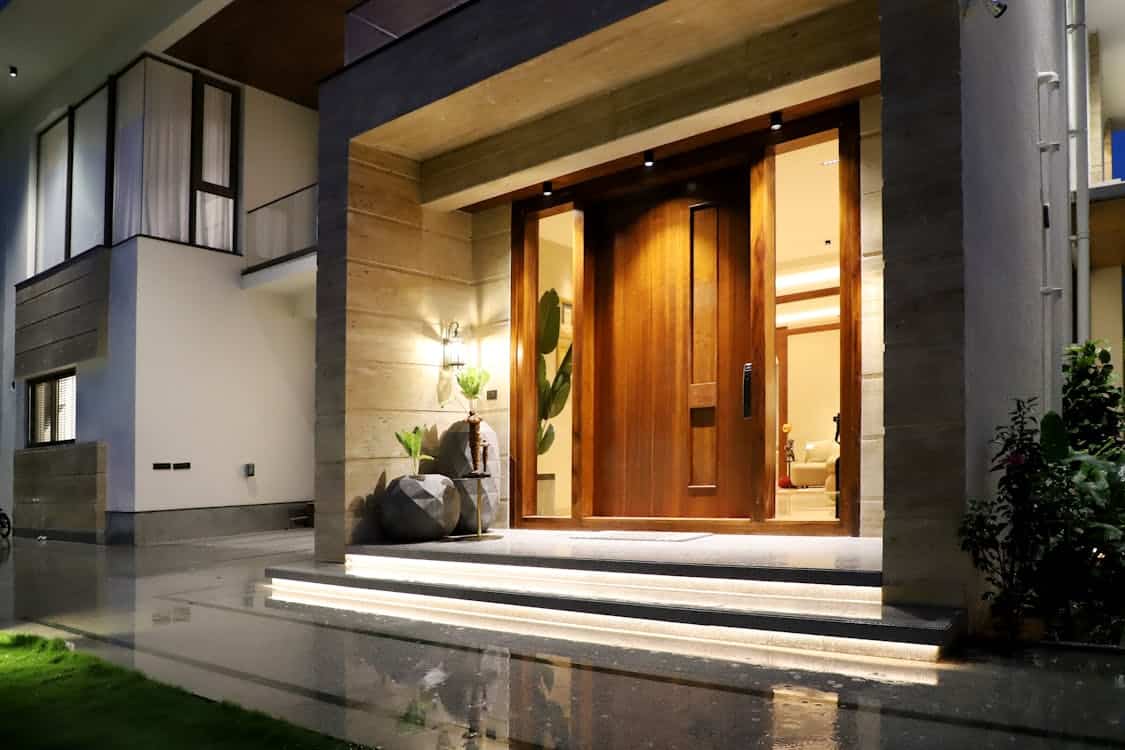
Match the look of fixtures to the main structure and to existing outdoor elements so the whole setup reads as a single story rather than a random collection of parts, and let finishes and forms echo gutters, railings, or garden furniture.
Metal tones, geometric shapes, and lens sizes should sit quietly within the scene when you want subtlety yet still offer presence when a feature calls for emphasis.
Low profile units hide in foliage to create soft pools of light, while larger heads can provide theatrical washes when used sparingly and at the right distance. Keep scale in mind so fixtures do not overpower small plants or disappear next to solid masonry.
2. Match Bulb Type To Purpose
LED lamps deliver long service life and high efficiency, which cuts run hours and reduces trips up a ladder, while halogen and incandescent options yield a familiar warmer tone often preferred for seating areas and close view tasks.
Color temperature shapes mood and clarity, so select warmer white where people gather and cooler white where crisp task illumination is needed, and be mindful that the same wattage can read differently across fixture types.
Lumens quantify output and the color rendering index shows how faithfully colors appear under a lamp, facts that help you pick a bulb that flatters plant foliage and fabric tones alike. If energy bills and maintenance intervals are a concern, many find LEDs to be the practical choice because they blend economy with a wide range of color and beam options.
Check whether fixtures use replaceable bulbs or sealed light engines so you can plan for future changes in output or hue without swapping housings when tastes shift. Sealed units often deliver weather tightness and low upkeep for years, while serviceable fixtures allow you to upgrade color temperature or lumen level as needs evolve.
In coastal environments it is also wise to choose durable components and housings that can withstand SoCal’s coastal fog, since persistent moisture and salt air can shorten the life of poorly protected lighting systems.
Confirm that bulb base type, physical size, and recommended wattage match the housing so you avoid heat issues or poor fit that shorten life. By reading labels and noting compatibility you reduce surprises at installation time and keep the system flexible.
3. Pay Attention To Beam And Spread
Beam control determines how a fixture sculpts the night, whether isolating a single trunk with a narrow cone or smoothing light across a wall with a wide fan of output. A narrow beam acts like a spotlight that draws the eye to texture and form, while a wide beam functions like a soft wash that helps a seating area feel inviting and even.
Combining focused accents with broader washes produces depth and contrast so the scene avoids that flat, overlit look and instead has pockets of interest and shadow. Think like someone framing a photograph who balances highlights and shadows to keep the eye moving rather than letting it lock on a single bright area.
Aim fixtures carefully to lower glare and to keep light off neighbors and adjacent windows, since poor aiming undermines both comfort and privacy. Shielded lenses, adjustable heads, and snoots help steer illumination exactly where needed without excessive spill, which keeps paths navigable while leaving darker spaces for night sky views.
Small changes in angle or moving a lamp a few feet can change the whole composition and turn a harsh beam into a gentle highlight. Test positions after dusk and tweak until the pattern reads the way you intended.
4. Think About Durability And Weather Resistance
Outdoor fixtures need to resist moisture, temperature swings, and tiny invaders like insects to perform season after season, so check housings and seals with care before you buy. Corrosion resistant finishes, robust gasketing around lenses, and secure wiring access points all add up to longer service life, especially in coastal or humid locations where salt and damp speed wear.
Metal bodies and thick or layered coatings usually outlast thin plastics when exposed to sun and wind, and hardware such as stainless fasteners fights rust that can seize parts together. When storms or heavy snowfall are likely, select fixtures with extra mechanical strength and proven sealing to reduce repair visits.
Read manufacturer warranties and service notes so you know suggested care steps and what is covered if a part fails, and lean toward units that open easily for maintenance when bulbs or seals require attention.
A modular fixture that allows lens and gasket replacement saves time and lowers long term cost versus a sealed unit that must be discarded at the first fault, though sealed designs do have advantages for absolute water tightness.
Ground mounted pieces benefit from solid stakes and secure bases that stand up to pets, mowers, and the occasional bump, while overhead or wall units need anchors sized for the local winds. Paying attention to build quality up front often reduces hassle and expense down the road.
5. Plan Placement And Control Options
Map out where light should fall and mark major beds, thresholds, and walking lines so you can imagine practical routes and visual stops rather than scattering fixtures randomly across the property.
Grouping lights into zones that share switching lets you run only the areas you need on a given night, which saves energy and extends bulb life, and zoning also supports different uses such as dining, safe passage, and feature highlighting.
A simple plan that separates task illumination from decorative accents gives flexibility and makes later tweaks easier without redoing the whole setup. Control choices influence daily convenience and long term operational cost in ways you will notice every evening.
Timers and photocells handle routine on and off functions automatically while motion sensors add safety and cut run hours for remote spots that do not need constant glow, and app based controllers bring mobile convenience when you want to adjust scenes from inside the house.
Wireless switches and low voltage control wiring reduce the need to trench across planting beds, and planning for future expansion now saves labor if you add more features later. Choose controls that match how you live so the system is intuitive and gets used rather than left switched off, and keep wiring routes accessible to support upgrades without major disruption.